
QFX Meshify lets you generate 3D assets directly in the editor.
The plugin offers batchable workflows that can process multiple prompts or images at once, transforming them into ready-to-use Unreal assets.
It automatically creates meshes, generates PBR textures, sets up materials, and imports everything into your project.
While these AI models are still in their early stages and don’t produce AAA quality meshes, the results are valuable for blocking, prototyping, and concept development. This makes it an ideal tool for rapid environment building and visualization. You can quickly turn reference images into fully textured 3D assets, saving hours of manual modeling and material setup.
This plugin runs fully local. No fees, no subscriptions, no credits.
⚠️ IMPORTANT
The plugin is designed to run exclusively on Windows systems with NVIDIA graphics cards.
A minimum of 16GB VRAM on an NVIDIA GPU is required for smooth plugin performance.
It has been tested with the following hardware:
💠 GeForce 3090Ti (24GB VRAM)
💠 GeForce 4080 Super (16GB VRAM)
If your GPU VRAM is lower than 24 GB of VRAM, I recommend opening an empty scene in Unreal Engine to ensure enough memory is available for the tool to run smoothly.
⏯️ VIDEO PREVIEW
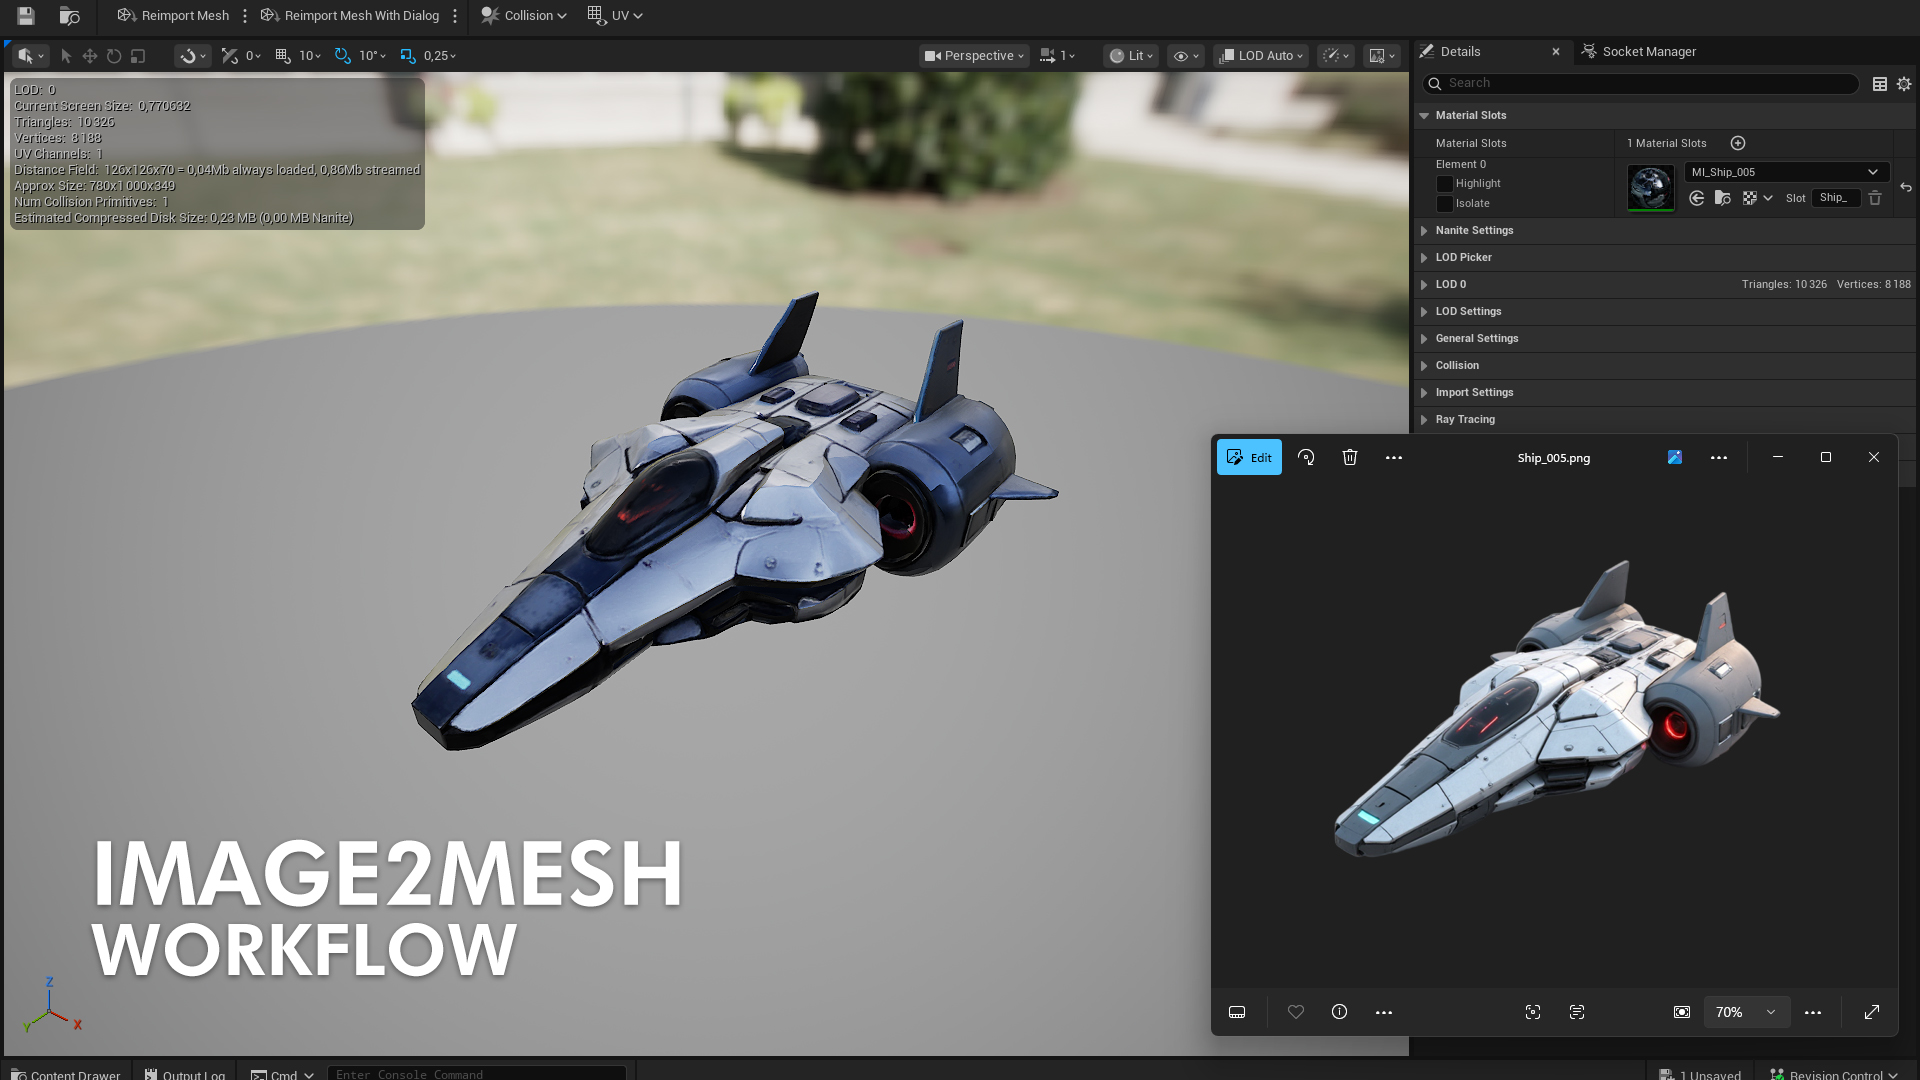
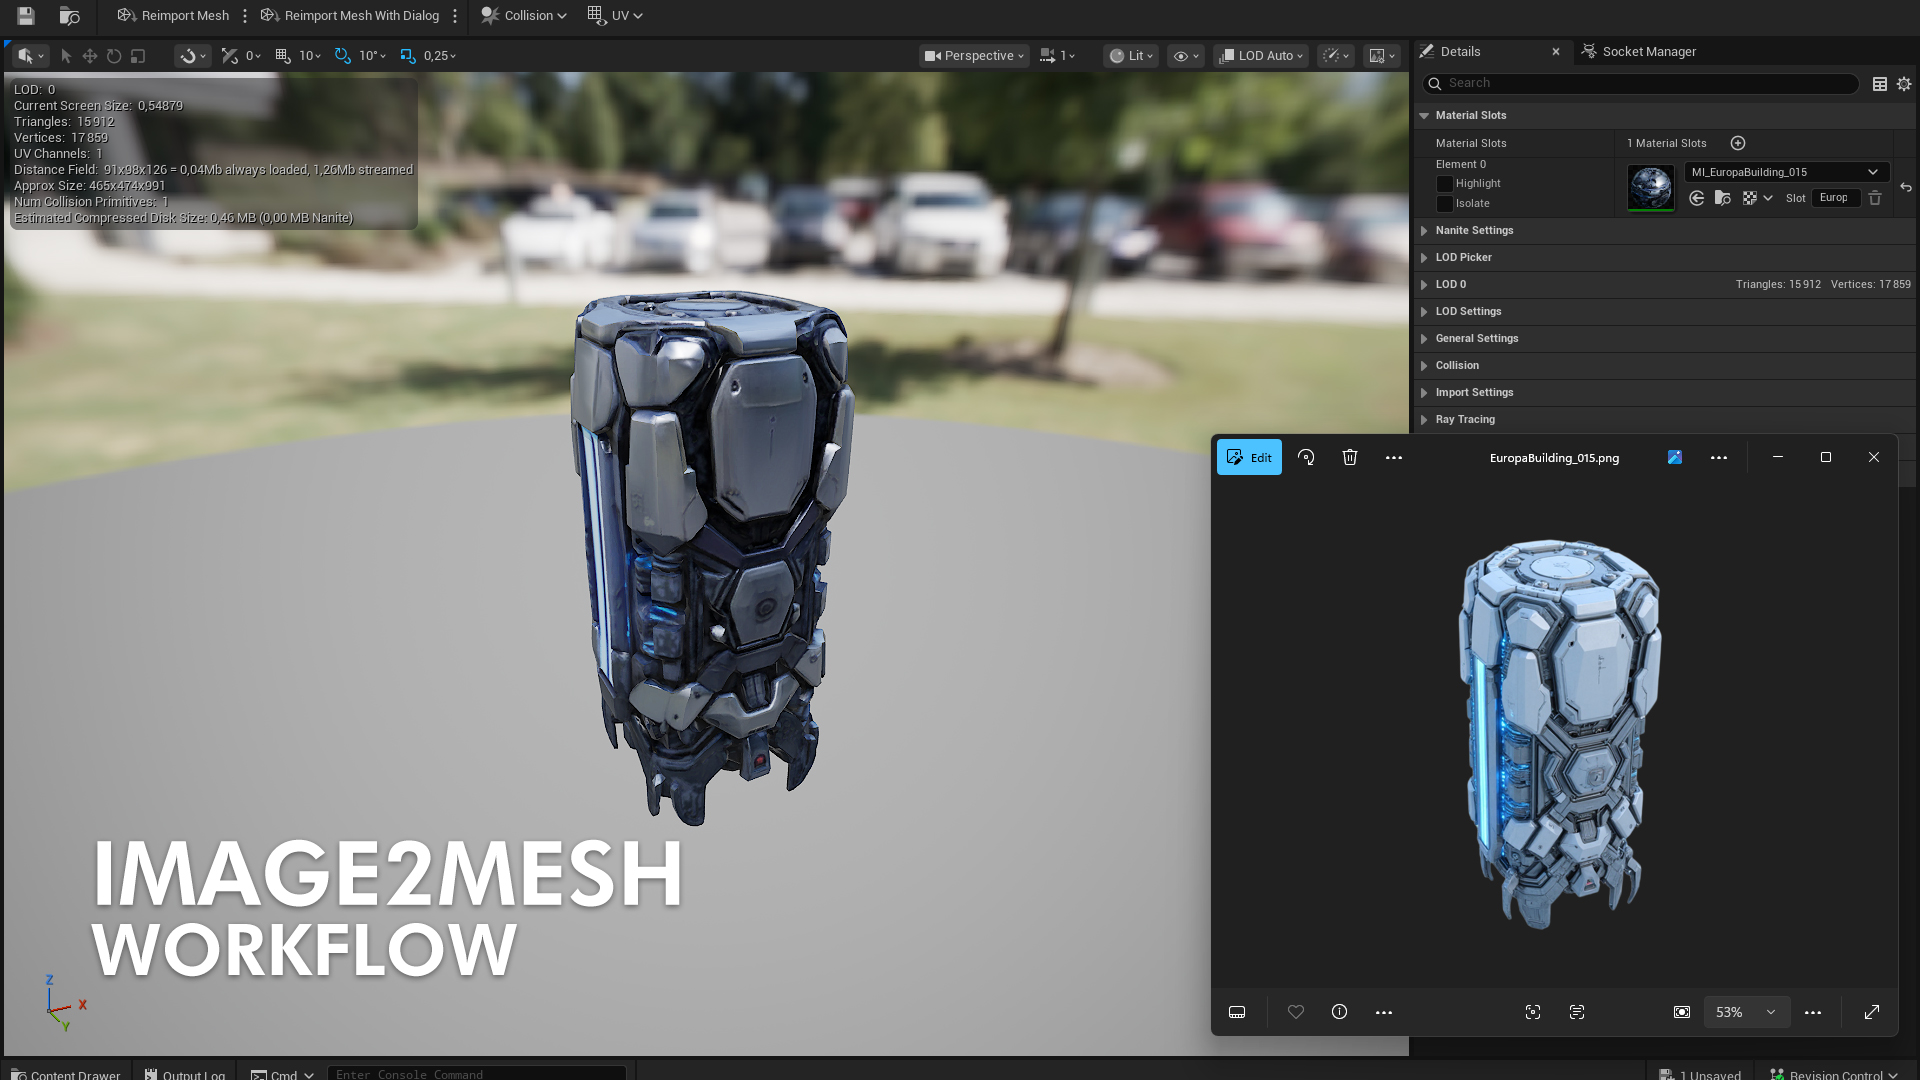
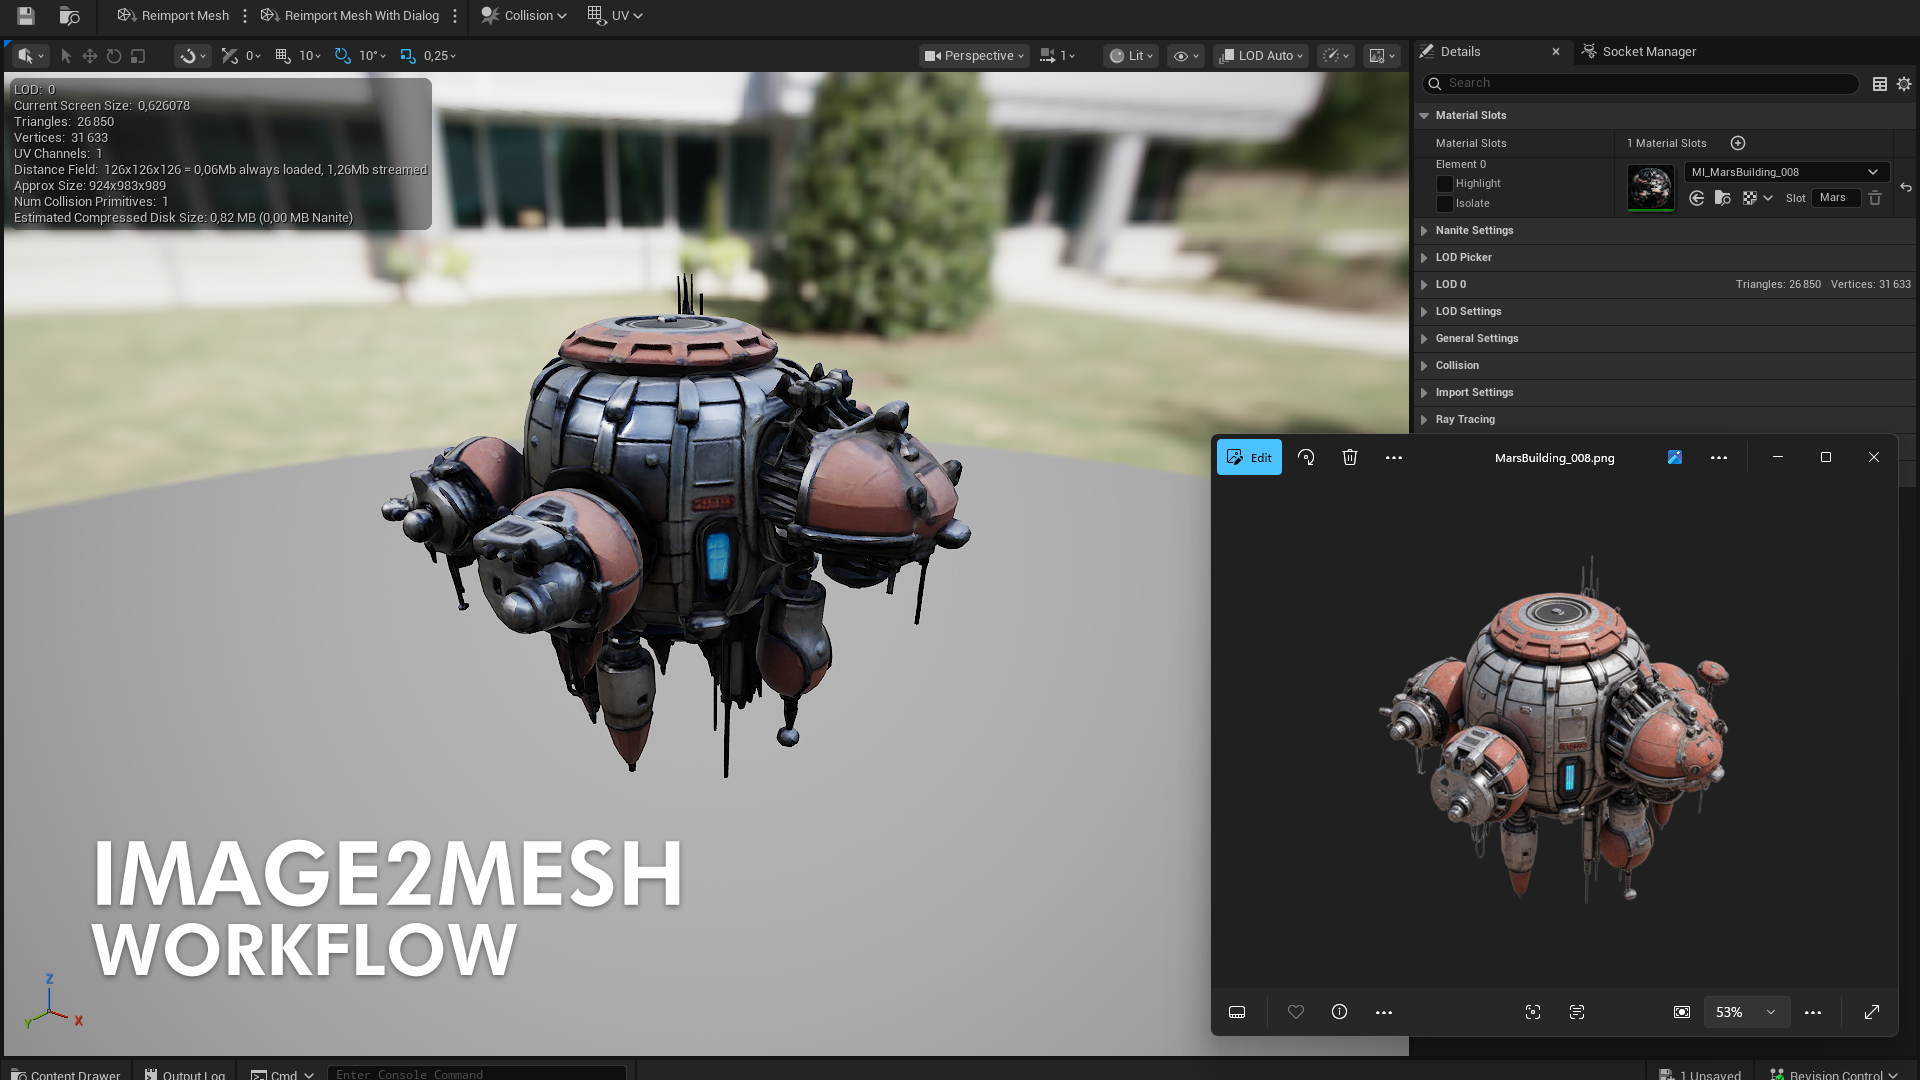
IMAGE2MESH SAMPLES
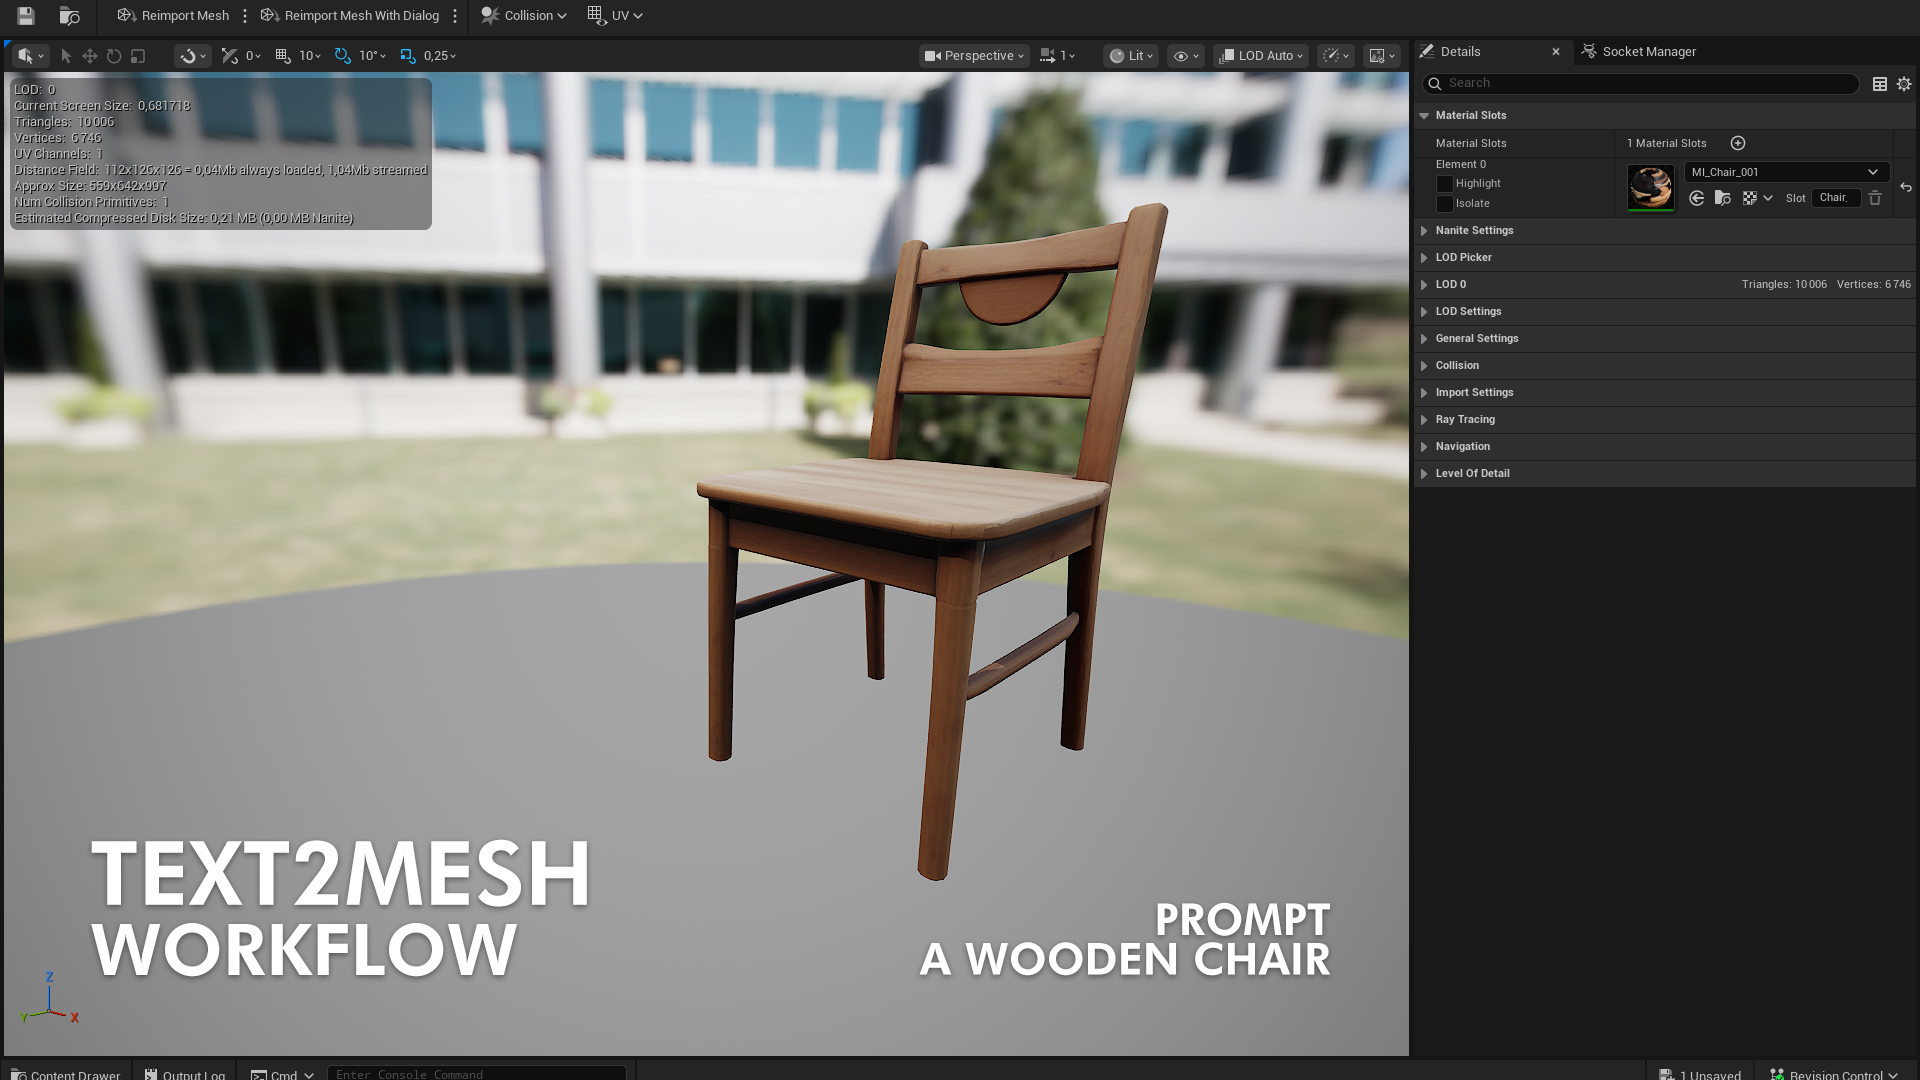
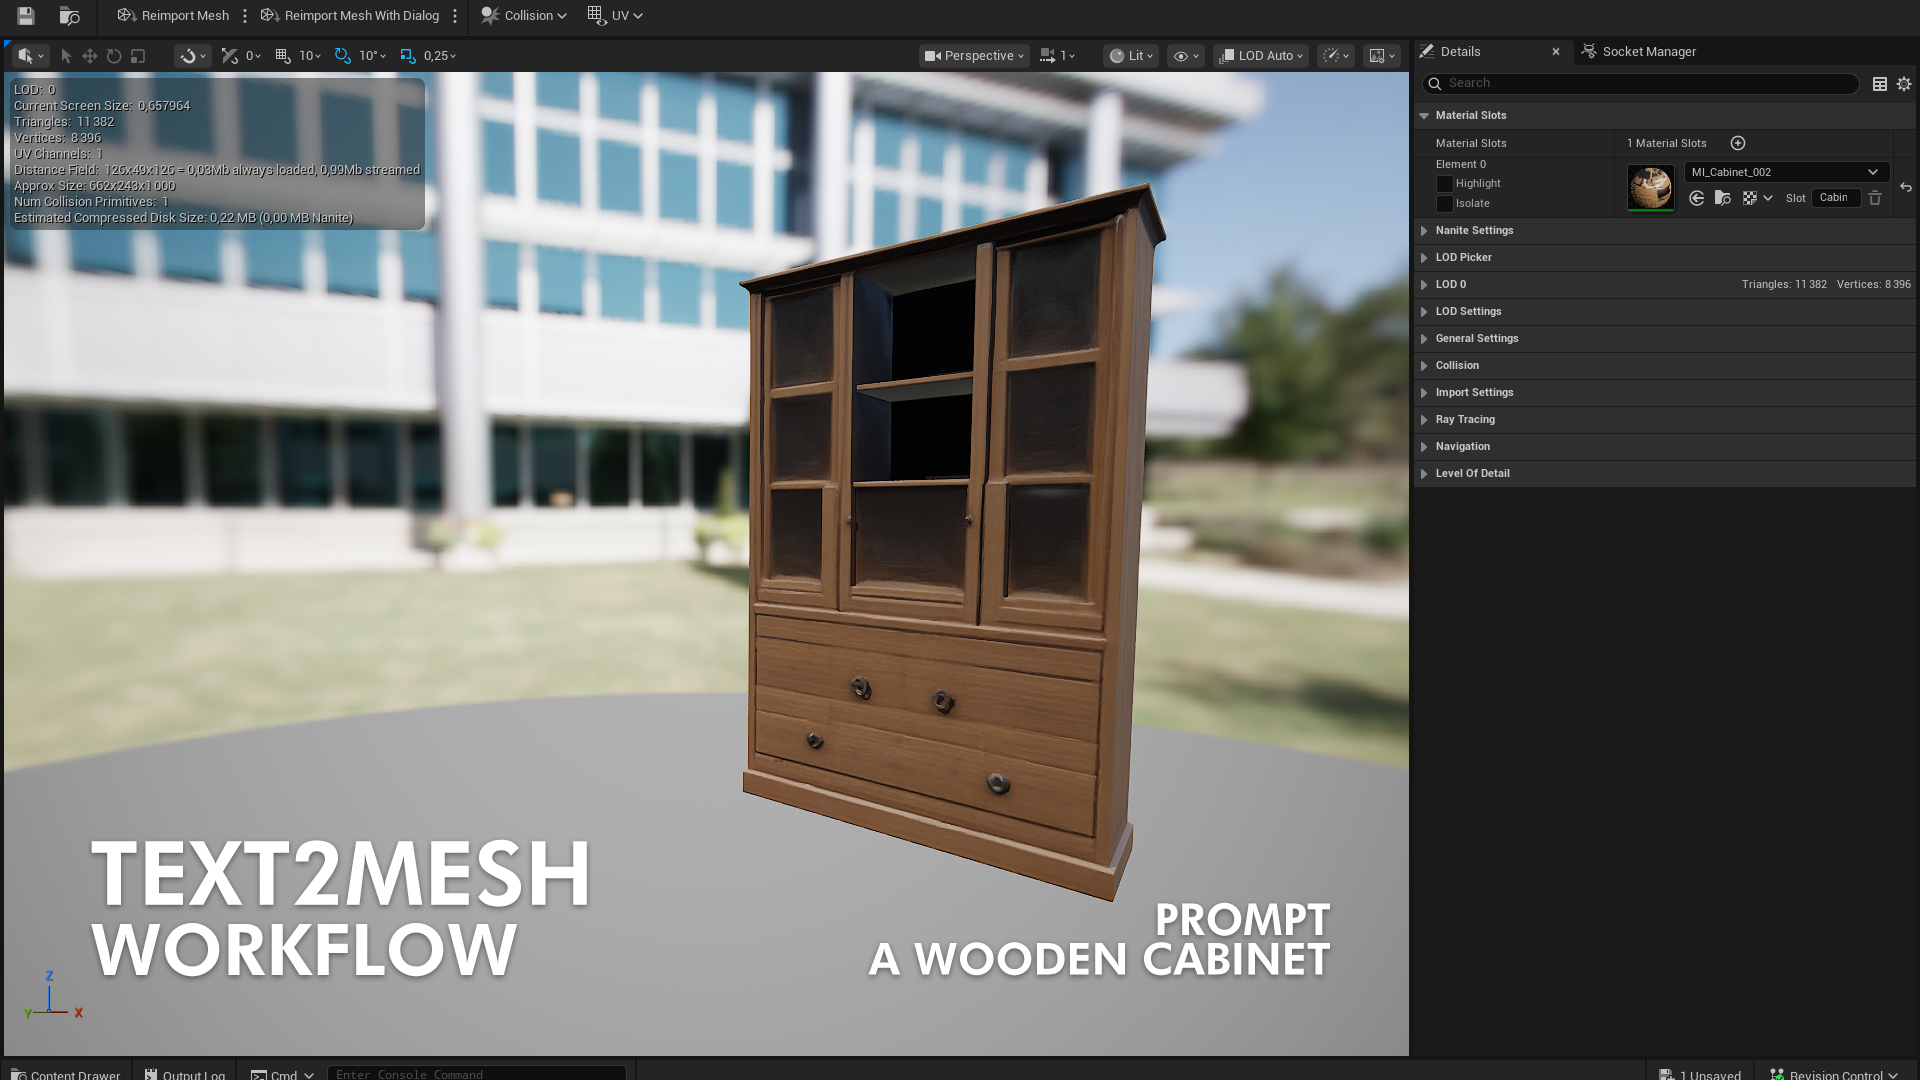
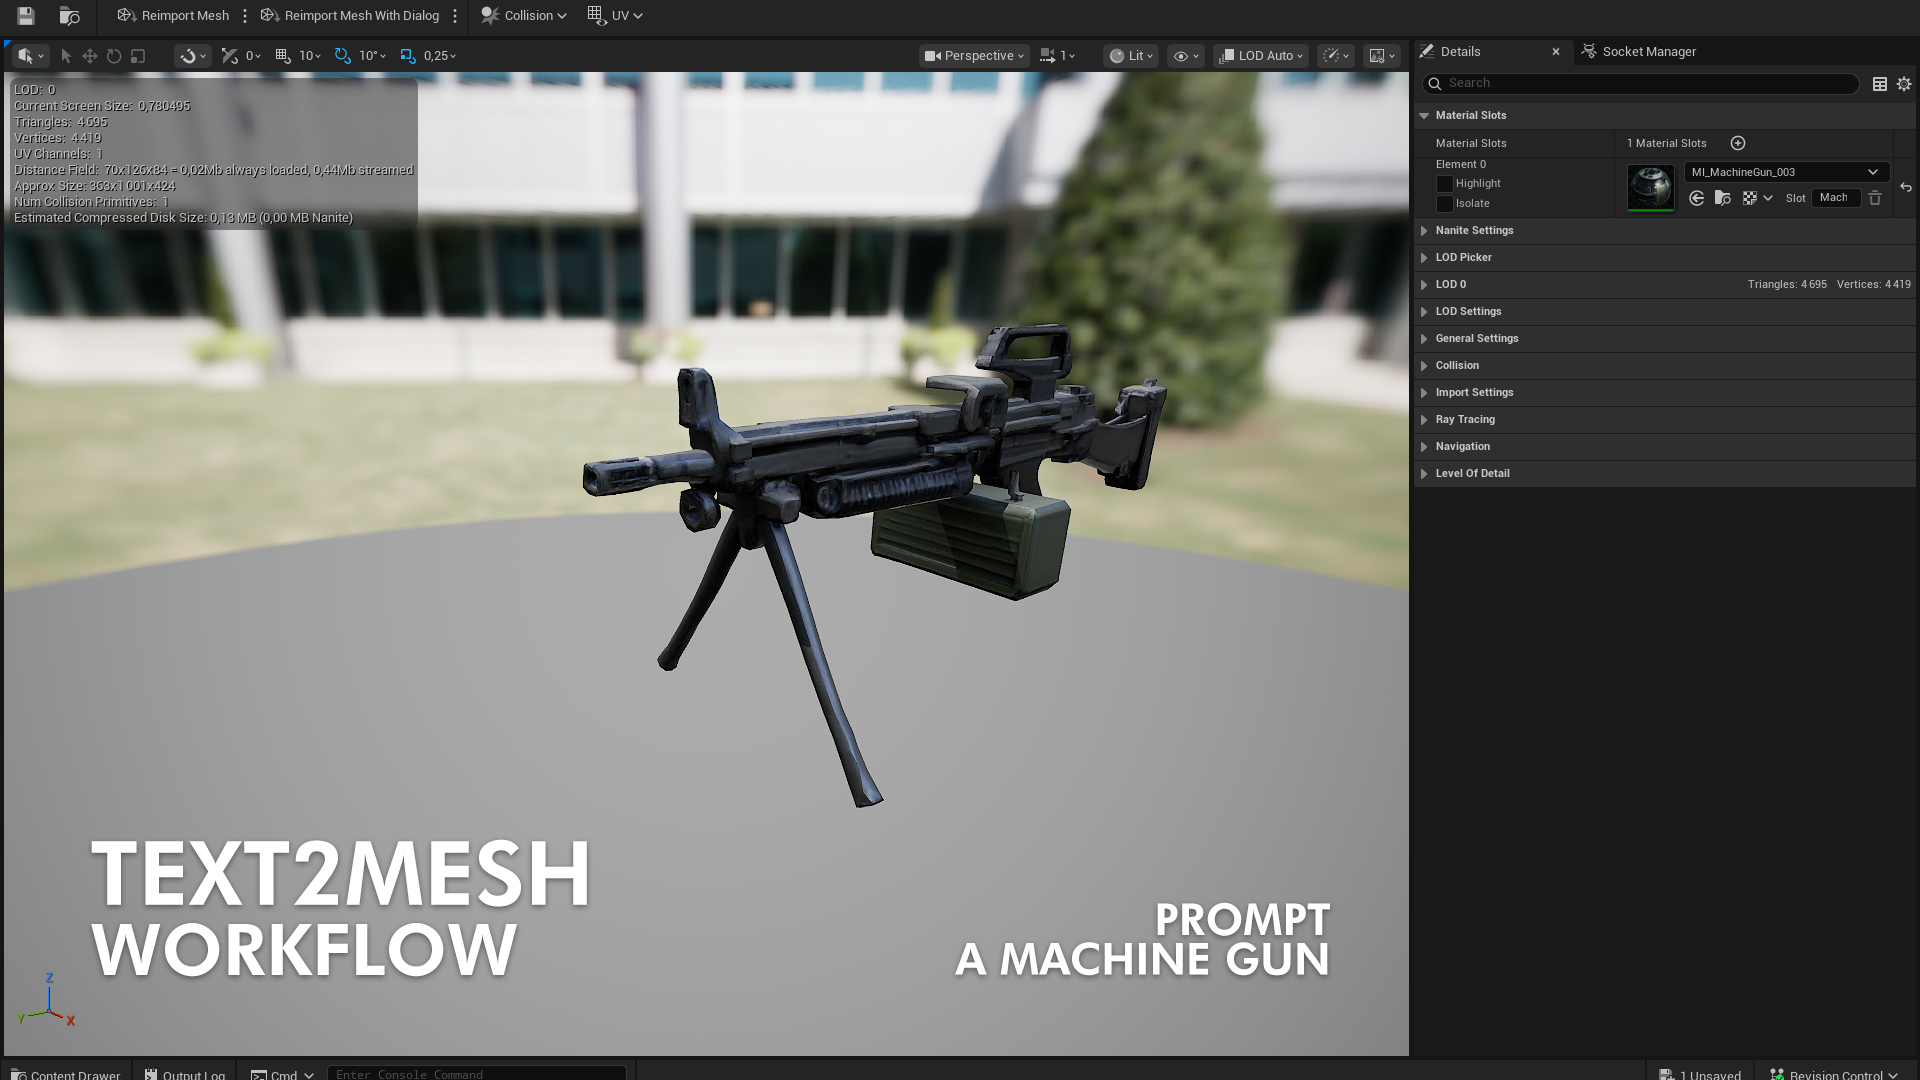
TEXT2MESH SAMPLES
Third-party software
- Trellis, used for mesh and albedo texture generation (developed by Microsoft, MIT License)
- MaterialMapGen, used for some of the PBR Textures generation (developed by Joey Ballentine, Apache License 2.0)
Render Statistics
|
Workflow |
Model Type |
GPU |
Sampling Parameters |
Render Time |
|
Image2Mesh |
– |
3090Ti 24 GB |
Steps: 30, CFG: 7.5 |
48sec |
|
Text2Mesh |
xlarge |
3090Ti 24 GB |
Steps: 30, CFG: 7.5 |
57sec |
|
Image2Mesh |
– |
4080s 16 GB |
Steps: 30, CFG: 7.5 |
48sec |
|
Text2Mesh |
large |
4080s 16 GB |
Steps: 30, CFG: 7.5 |
47sec |
🛠️ PREREQUISITES
HARDWARE
The plugin is designed to run exclusively on Windows systems with NVIDIA graphics cards.
A minimum of 16GB VRAM on an NVIDIA GPU is required for smooth plugin performance.
It has been tested with the following hardware:
💠 GeForce 3090Ti (24GB VRAM)
💠 GeForce 4080 Super (16GB VRAM)
SOFTWARE
Then, make sure the following software are installed on your system:
💠 Python 3.10.x – Download
💠 Git for Windows – Download
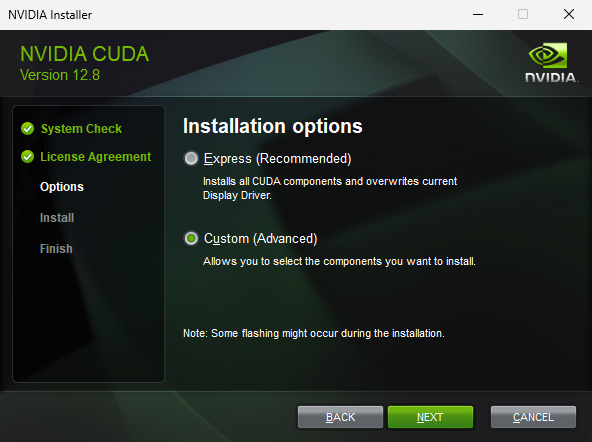
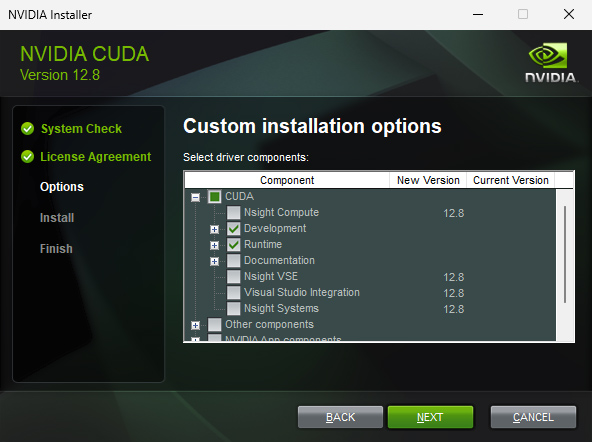
💠 CUDA ToolKit 12.8 – Download
When installing CUDA ToolKit, you only need the following features:
⚙️ INSTALL TRELLIS-MATGEN
Ensure your hard drive has at least 42 GB of free space before continuing.
1. Download or Clone TRELLIS fork from Github:
Download the repo from here, and unzip it somewhere on your computer (e.g. C:\TrellisMatGen)
or, Clone using the following command line:
git clone https://github.com/qornflex/TrellisMatGen.git
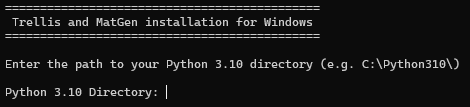
2. When the repo is cloned or downloaded and unzipped, simply look for setup.bat, double click on it, and follow the instructions.
The installer will ask you to provide a few things, such as your Python 3.10.x directory:
And your CUDA ToolKit directory:

Once started, the installer will download the related models from Huggingface and will install the required python dependencies automatically.
This process can take ~30min, depending on your internet speed.
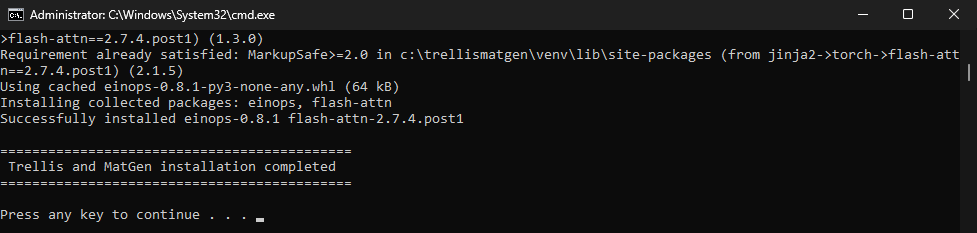
When the process is done, you should see this message, confirming the installation is completed:
3. At this point, you can start Unreal Engine and open the plugin tool window from the menu bar, right here:

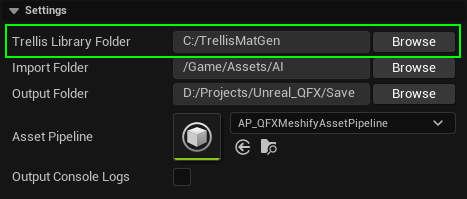
4. Before using the tool, the first thing to do is to go to the settings panel and specify the path to your Trellis Installation folder:
Now, you’re ready to generate meshes in Unreal Engine. Enjoy! 🤘
📑 DOCUMENTATION
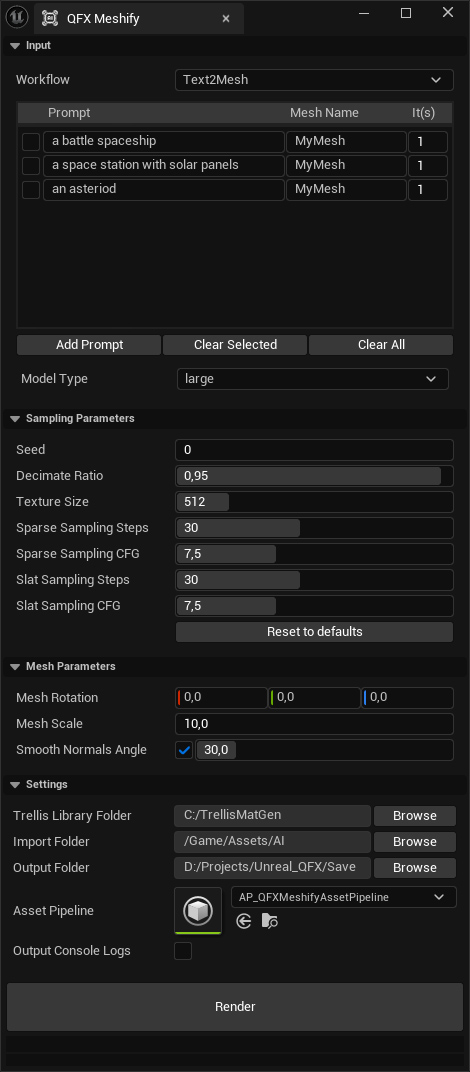
The plugin window looks like this:
WORKFLOWS
The plugin offers 2 workflows, Text2Mesh and Image2Mesh.
As the names suggest, Text2Mesh turns text prompts into 3D assets, and Image2Mesh does the same using images.
Text2Mesh
In this workflow, you can add multiple prompts and specify the number of iterations for each.
For example, here are four different prompts: we request 3 iterations for the Chair and 2 iterations for the Palm Tree.
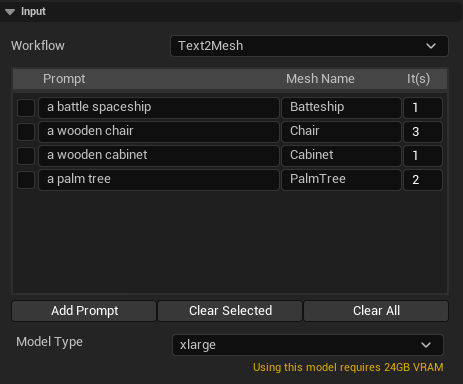
Model Type
Selects model size (Base, Large, XL) based on your GPU’s VRAM capacity.
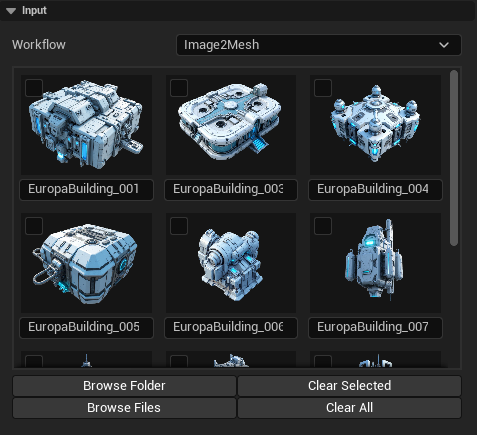
Image2Mesh
In this workflow, you can add multiple images using the Browse Folder or Browse Files buttons.
You can also rename each image individually, and these names will be used for the generated assets.
SAMPLING PARAMETERS
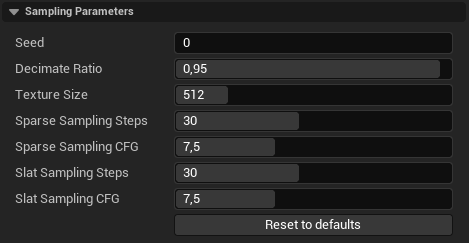
Seed
Determines the starting point for the random number generator used during mesh and texture generation. Using the same seed will produce identical results, while changing the seed creates variations. This is useful for recreating a specific output or exploring multiple design alternatives.
Decimate Ratio
Controls the level of mesh simplification after generation. A lower ratio preserves more detail but results in a higher polygon count, while a higher ratio reduces polygons, making the mesh lighter and faster to render but potentially less detailed.
Texture Size
Specifies the resolution of the generated textures (e.g., diffuse, normal, roughness maps). Higher values produce more detailed textures but require more memory and processing power. Lower values reduce file size and improve performance, but may result in less sharp textures.
Sparse Sampling Steps
Determines the number of steps taken during the sparse sampling phase of mesh generation. Higher values generally produce more detailed geometry but may increase computation time.
Sparse Sampling CFG
Controls the influence of the sparse sampling guidance during mesh generation. A higher value makes the algorithm adhere more closely to the intended design or input prompt, while lower values allow more variation.
Slat Sampling Steps
Specifies the number of steps during the slat sampling phase, which refines the mesh with additional structural details. Increasing this value can enhance fine features but may slow down processing.
Slat Sampling CFG
Sets the strength of guidance during slat sampling. Higher values result in the mesh more strictly following the input constraints, while lower values introduce more randomness and creative variation.
MESH PARAMETERS
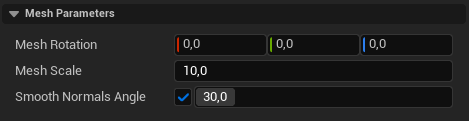
Mesh Rotation
Adjusts the orientation of the mesh in the scene.
Mesh Scale
Changes the overall size of the mesh.
Smooth Normals Angle
Controls smoothing of surfaces; lower values keep edges sharp, higher values make them smoother.
SETTINGS
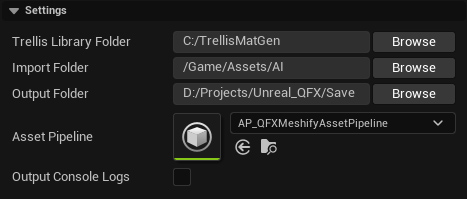
Trellis Library Folder
Filesystem path where your TrellisMatGen library is installed.
Import Folder
Content Browser path where generated meshes will be imported in Unreal.
Output Folder
Filesystem path where generated meshes will be saved.
Asset Pipeline
Interchange pipeline used to import meshes and textures automatically.
Output Console Logs
Output TrellisMatGen logs in Unreal console window
INITIALIZING AI PIPELINE
This process can take ~60sec, depending on your hardware (GPU and PCIe bus speed).
It’s the time needed to upload the AI models on your GPU before starting the render batch.
![]()


2 comments
Join the conversationAvdoot Kumar - March 13, 2026
Would there be more updates or new versions coming up for this? Awesome plugin by the way!!
Q - March 13, 2026
A bit busy these days but yeah, I’ll try to provide new versions following the tech.